
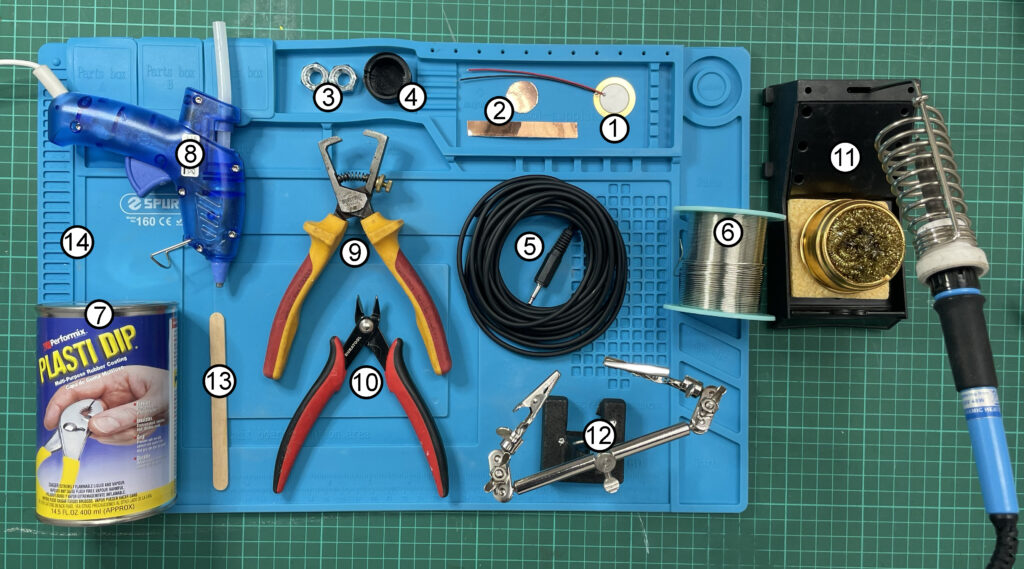
MATERIALS
- 1 – 27mm Piezo microphone element
- 2 – Sticky backed copper tape
- 3 – 2 x M10 nuts
- 4 – 3D printed hydrophone cap ( a plastic bottle top can also work )
- link to STL file to print with PLA cornstarch bioplastic
- 5 – 5m mono microphone cable with one 3.5mm mono jack end (cut a 10m cable in half)
- 6 – Solder
- 7 – Black plastidip
TOOLS
- 8 – Gluegun and glue sticks
- 9 – Wire strippers
- 10 – Wire cutters
- 11 – Soldering iron
- 12 – ‘Helping hand’ (not essential, but helpful!)
- 13 – Lollypop stick
- 14 – Heatproof soldering mat (not essential, but do protect your table and workspace)
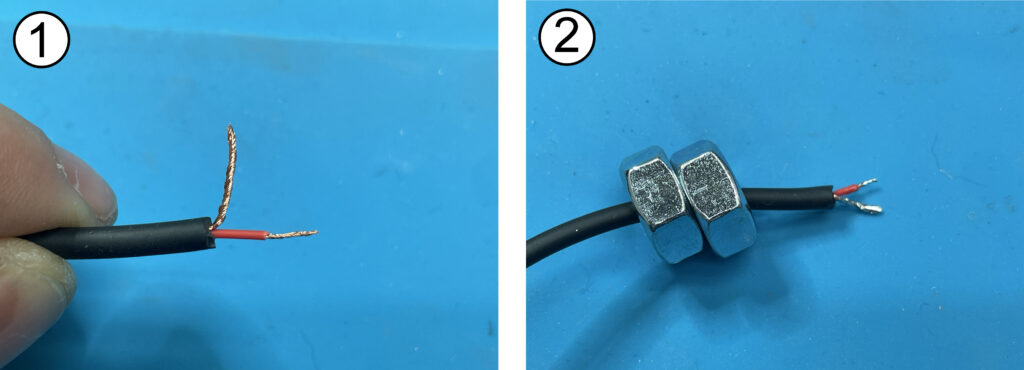
1 – Cut a 10m mono audio cable in half to make 2 x 5m lengths (use one half to make a hydrophone). Strip 10mm off the outer black insulation, twist the copper strands together. Strip 5mm off the red insulation and twist the wire strands together.
2 – Thread the 2 M10 bolts onto the cable – they can be pushed further along the cable so they are not in the way – but make sure they do not come off.
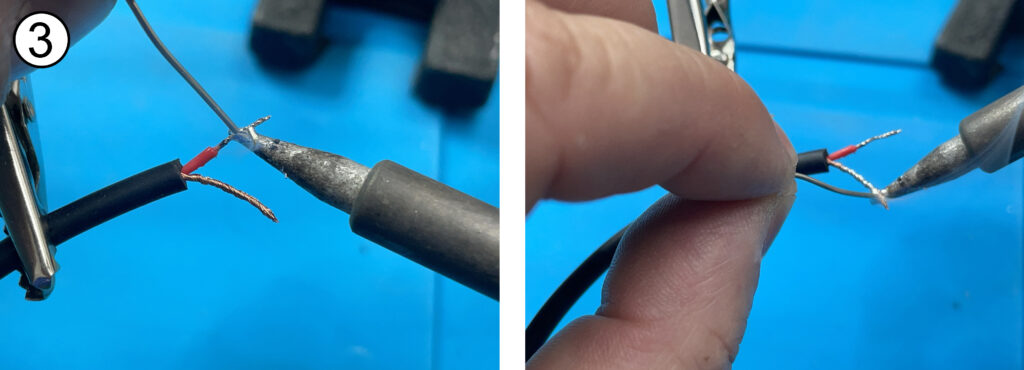
3 – Tin the exposed wires
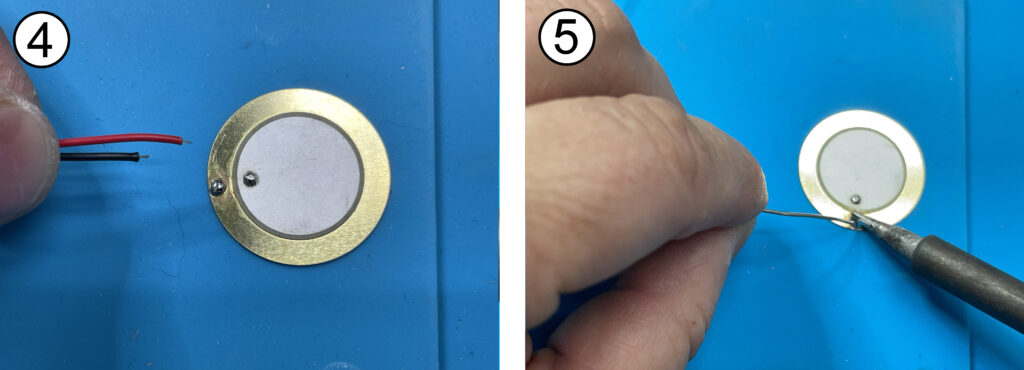
4 – Pull the wires off the 27mm piezo element (it’s a good to idea to very gently hold the soldering iron on the solder for a very short moment while doing this. Be careful not to touch the piezo crystal area of the piezo disc.
5 – Add more solder to the brass part – place soldering iron directly on brass long enough for the solder to melt into a pool that is does not look like a ‘ball’ on top of the brass
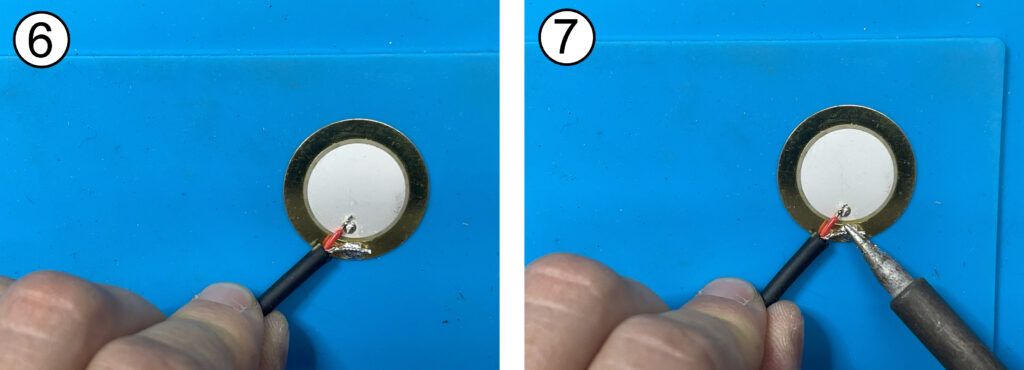
6 – trim the tinned ends of the cable so the two tinned wires line up with the existing ‘solder blobs’ on the piezo
7 – Solder the bare copper wire onto the brass part of the piezo.
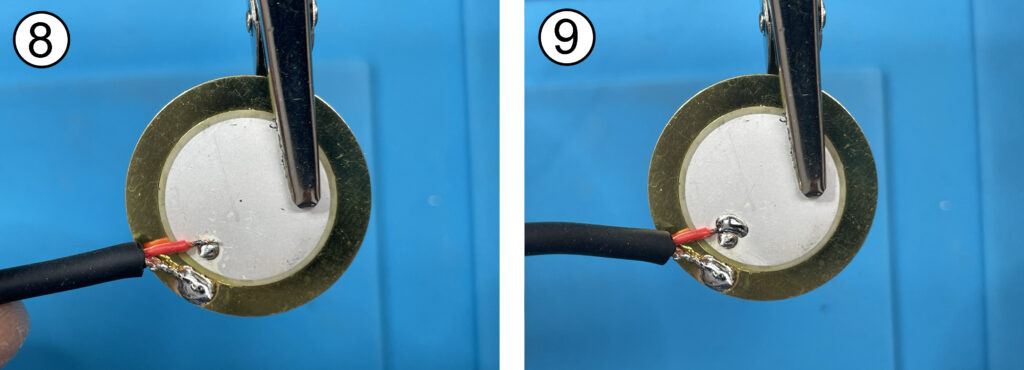
8 – Use the helping hand to arrange the red wire to be in contact with the existing solder blob on the piezo.
9 – Solder the red wire to this solder blob – careful not to solder through the crystals of the piezo onto the brass below. At this point, you can TEST the mic with a recorder to check your soldering
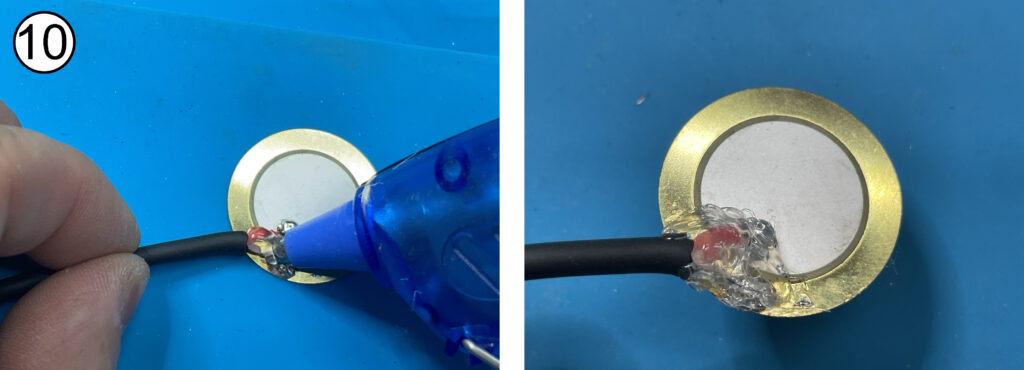
10 – cover the solder joins with hot glue – pay attention to where the black cable meets the brass. Do not use too much glue here. The glued piezo disc with cable needs to fit into the ‘cap’.
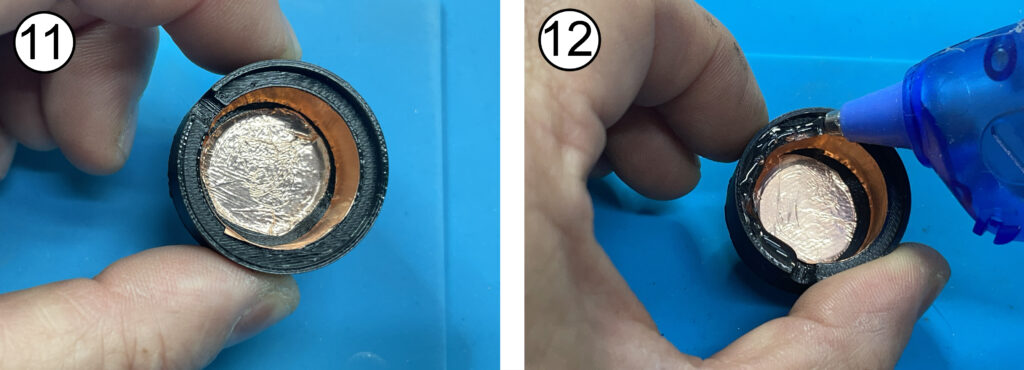
11 – line the inside of the hydrophone cap with copper tape. Use a strip 7cm x 1cm and a circle 2cm diameter
12 – Put a line of hot glue around the recessed rim of the hydrophone cap – then move to stage 13 QUICKLY
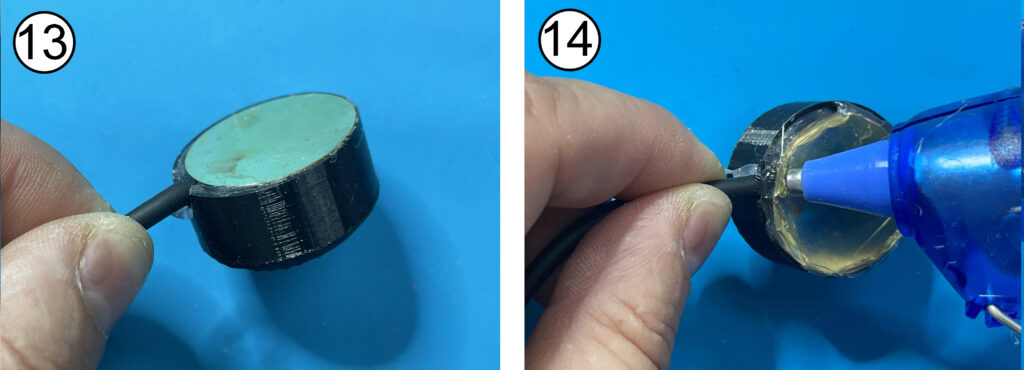
13 – Fit the piezo into the cap, lining up the cable with the notch. This will need to be done QUICKLY before the glue cools and sets.
14 – Add a thin layer of glue around the edge to make sure any gaps are filled, paying particular attention to where the cable joins. Do not use too much glue here
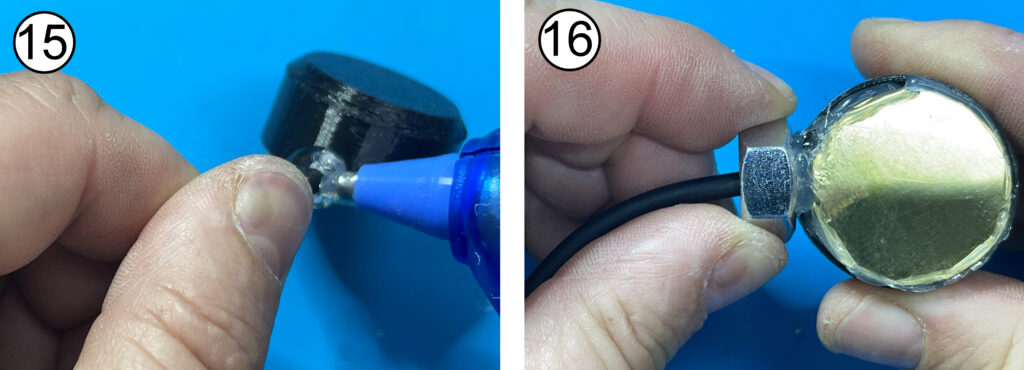
15 – Add a good amount of glue around the cable where it joins the cap.
16 – (Quickly, before the glue cools and sets) – slide the first M10 nut along the cable to join the cap and glue on as shown.
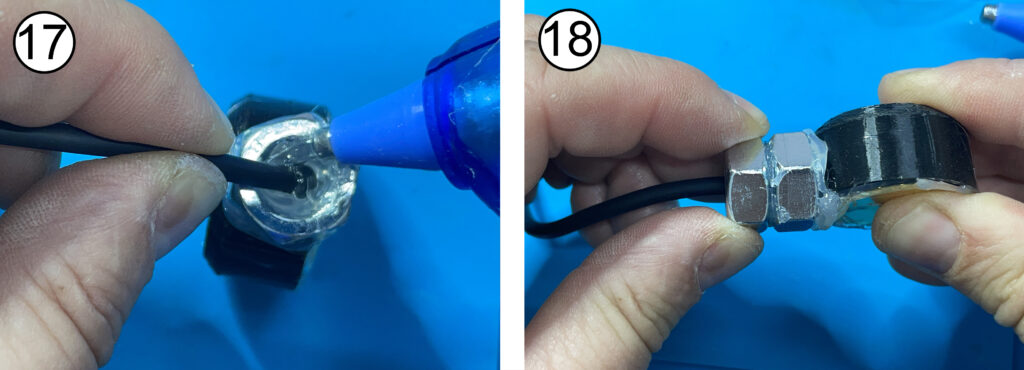
17 – Fill the inside of the nut with glue, and a bit more around the top and higher up the cable.
18 – Slide the second M10 nut along the cable to stick onto of the first one, line up as shown below.
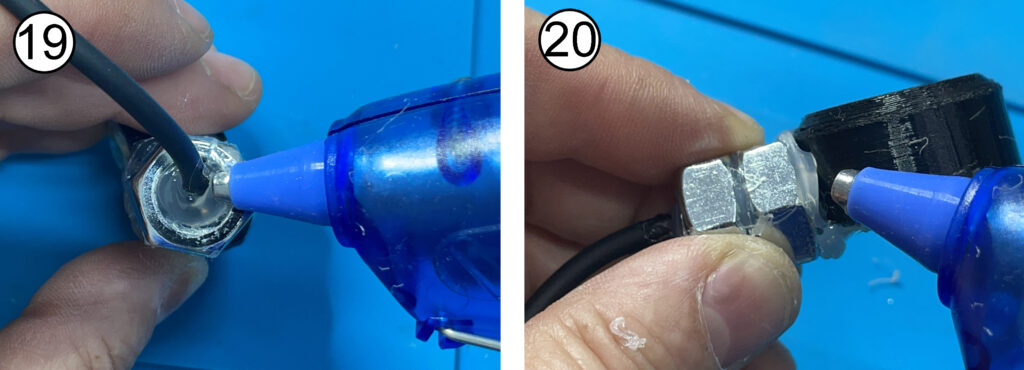
19 – Fill the inside of the nut with glue, make sure it is as even and smooth at the top as possible
20 – Check for any gaps between the nuts and between the nut and the cap – carefully fill with glue, using just enough, then clean off any glue strands
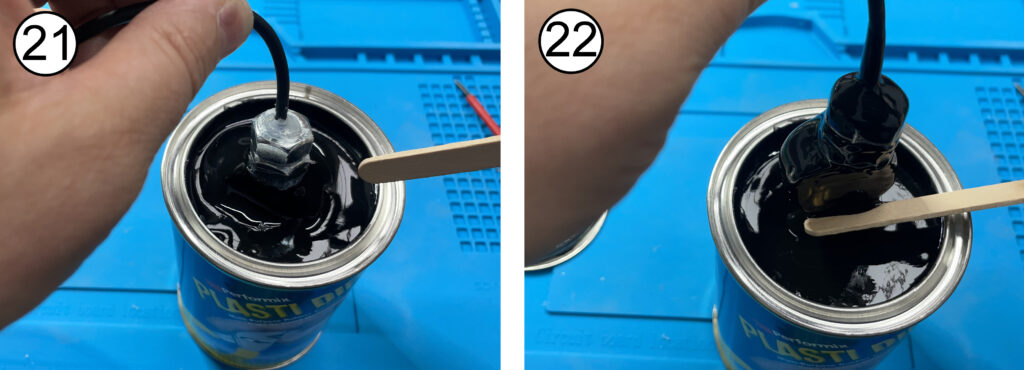
21 – Slowly and carefully dip into black plastidip.
22 – Use a lollipop stick or coffee stirrer to gently scrap off excess plastidip, but make sure all the surfaces are covered, especially at the points where the piezo meets the cap.
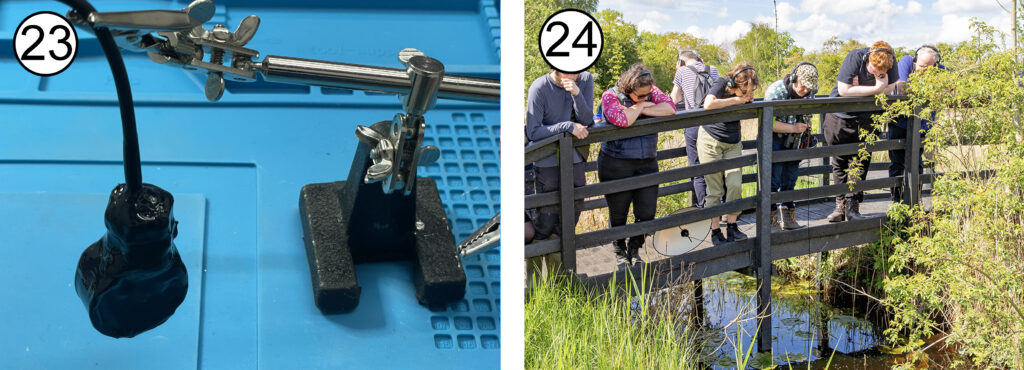
23 – Hang up to dry for about an hour. Examine it when set. It is recommended to do a second dip to cover any gaps or weak points. Remember – it has to be waterproof – BUT – try not to add too much plastidip or hot glue because it will make it less sensitive.
24 – Enjoy listening to underwater sounds with your new hydrophone !
more info or questions – email kathy [at] kathyhinde [dot] co [dot] uk
